 PixelBead
1. Choose a pet photo or portrait for a bead pattern
A bead pattern has much less detail than a photograph. A close-up of a pet or a simple portrait is usually easier to recognize than a wide scene with several people. Pick a photo where the subject stands apart from the background.
Before opening the app, ask yourself what needs to remain recognizable: the shape of the ears, a silhouette, or the main colors. Fine fur, tiny lettering and soft shadows may disappear when reduced to a grid.
2. How to choose a bead pattern grid size
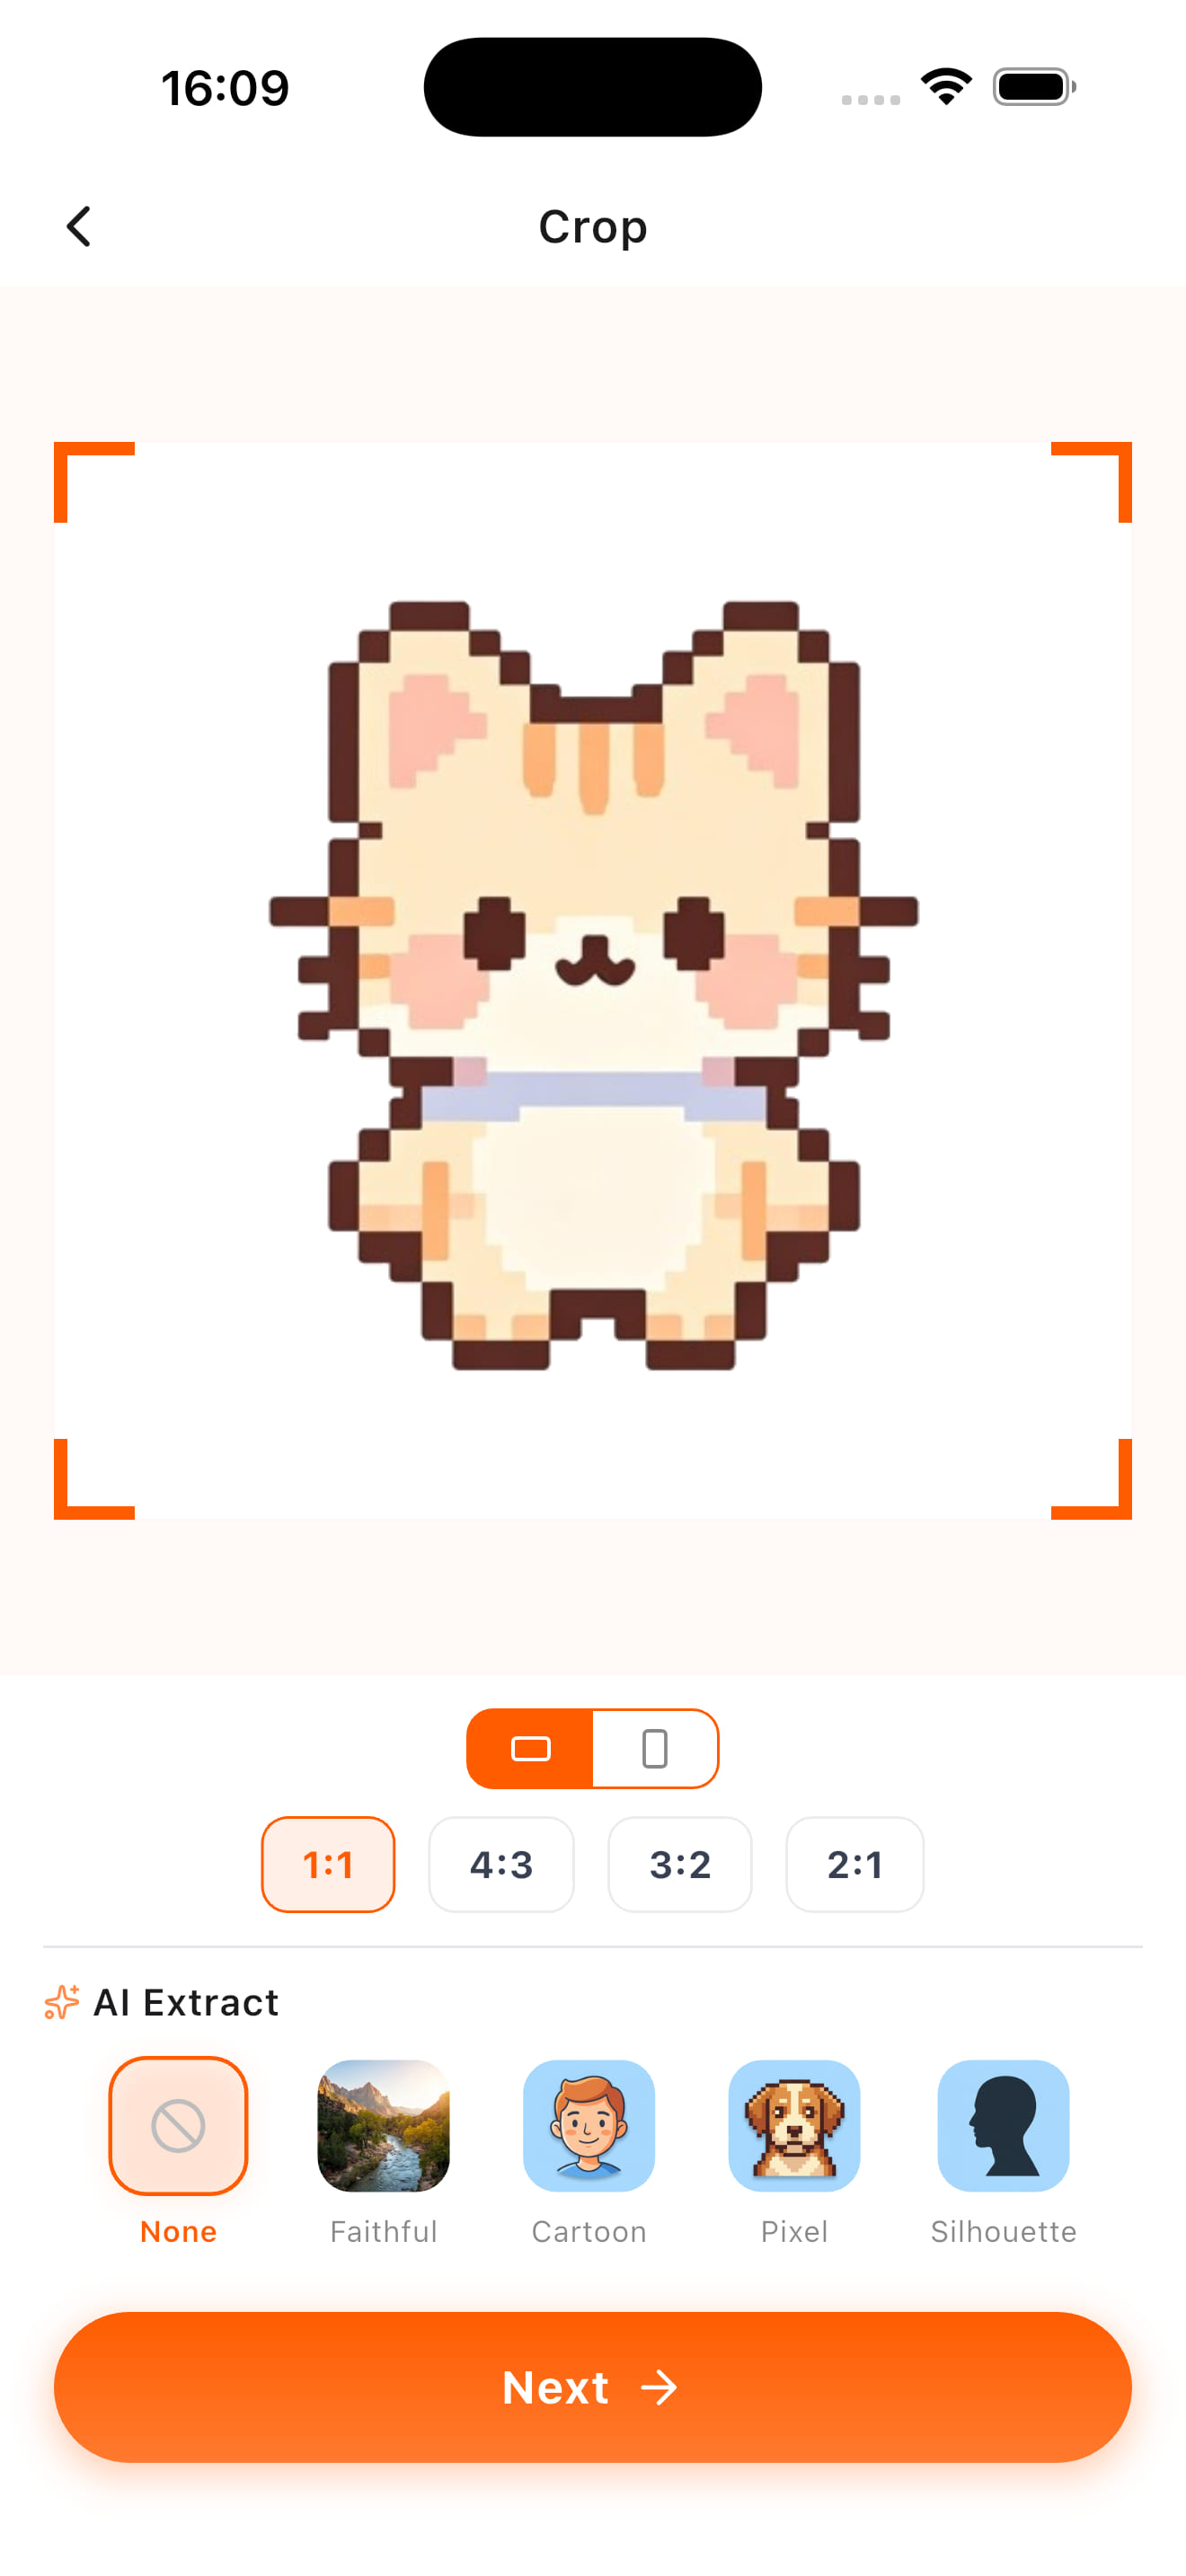
Import your photo into PixelBead and crop it. Choose a board layout or a custom pattern size that fits the project you want to make. A larger grid can retain more detail, but it also takes more beads and more time.
Start with a small project if this is your first attempt. Look at the preview at a comfortable size rather than judging it only while zoomed in. If the face or outline is hard to recognize, try a closer crop before increasing the size.
3. Match photo colors to Perler, Hama and other bead palettes
Select the bead brand palette that matches your materials, then adjust the number of colors. PixelBead includes palettes from Perler, Hama, Artkal and Nabbi. Using the right palette helps you plan with actual bead colors rather than arbitrary screen colors.
A photo can contain many similar shades. Reducing the color count can make preparation and assembly easier, but too few colors may flatten important details. Compare the eyes, outlines and shadows as you adjust the pattern.
4. Edit small details in a photo bead pattern
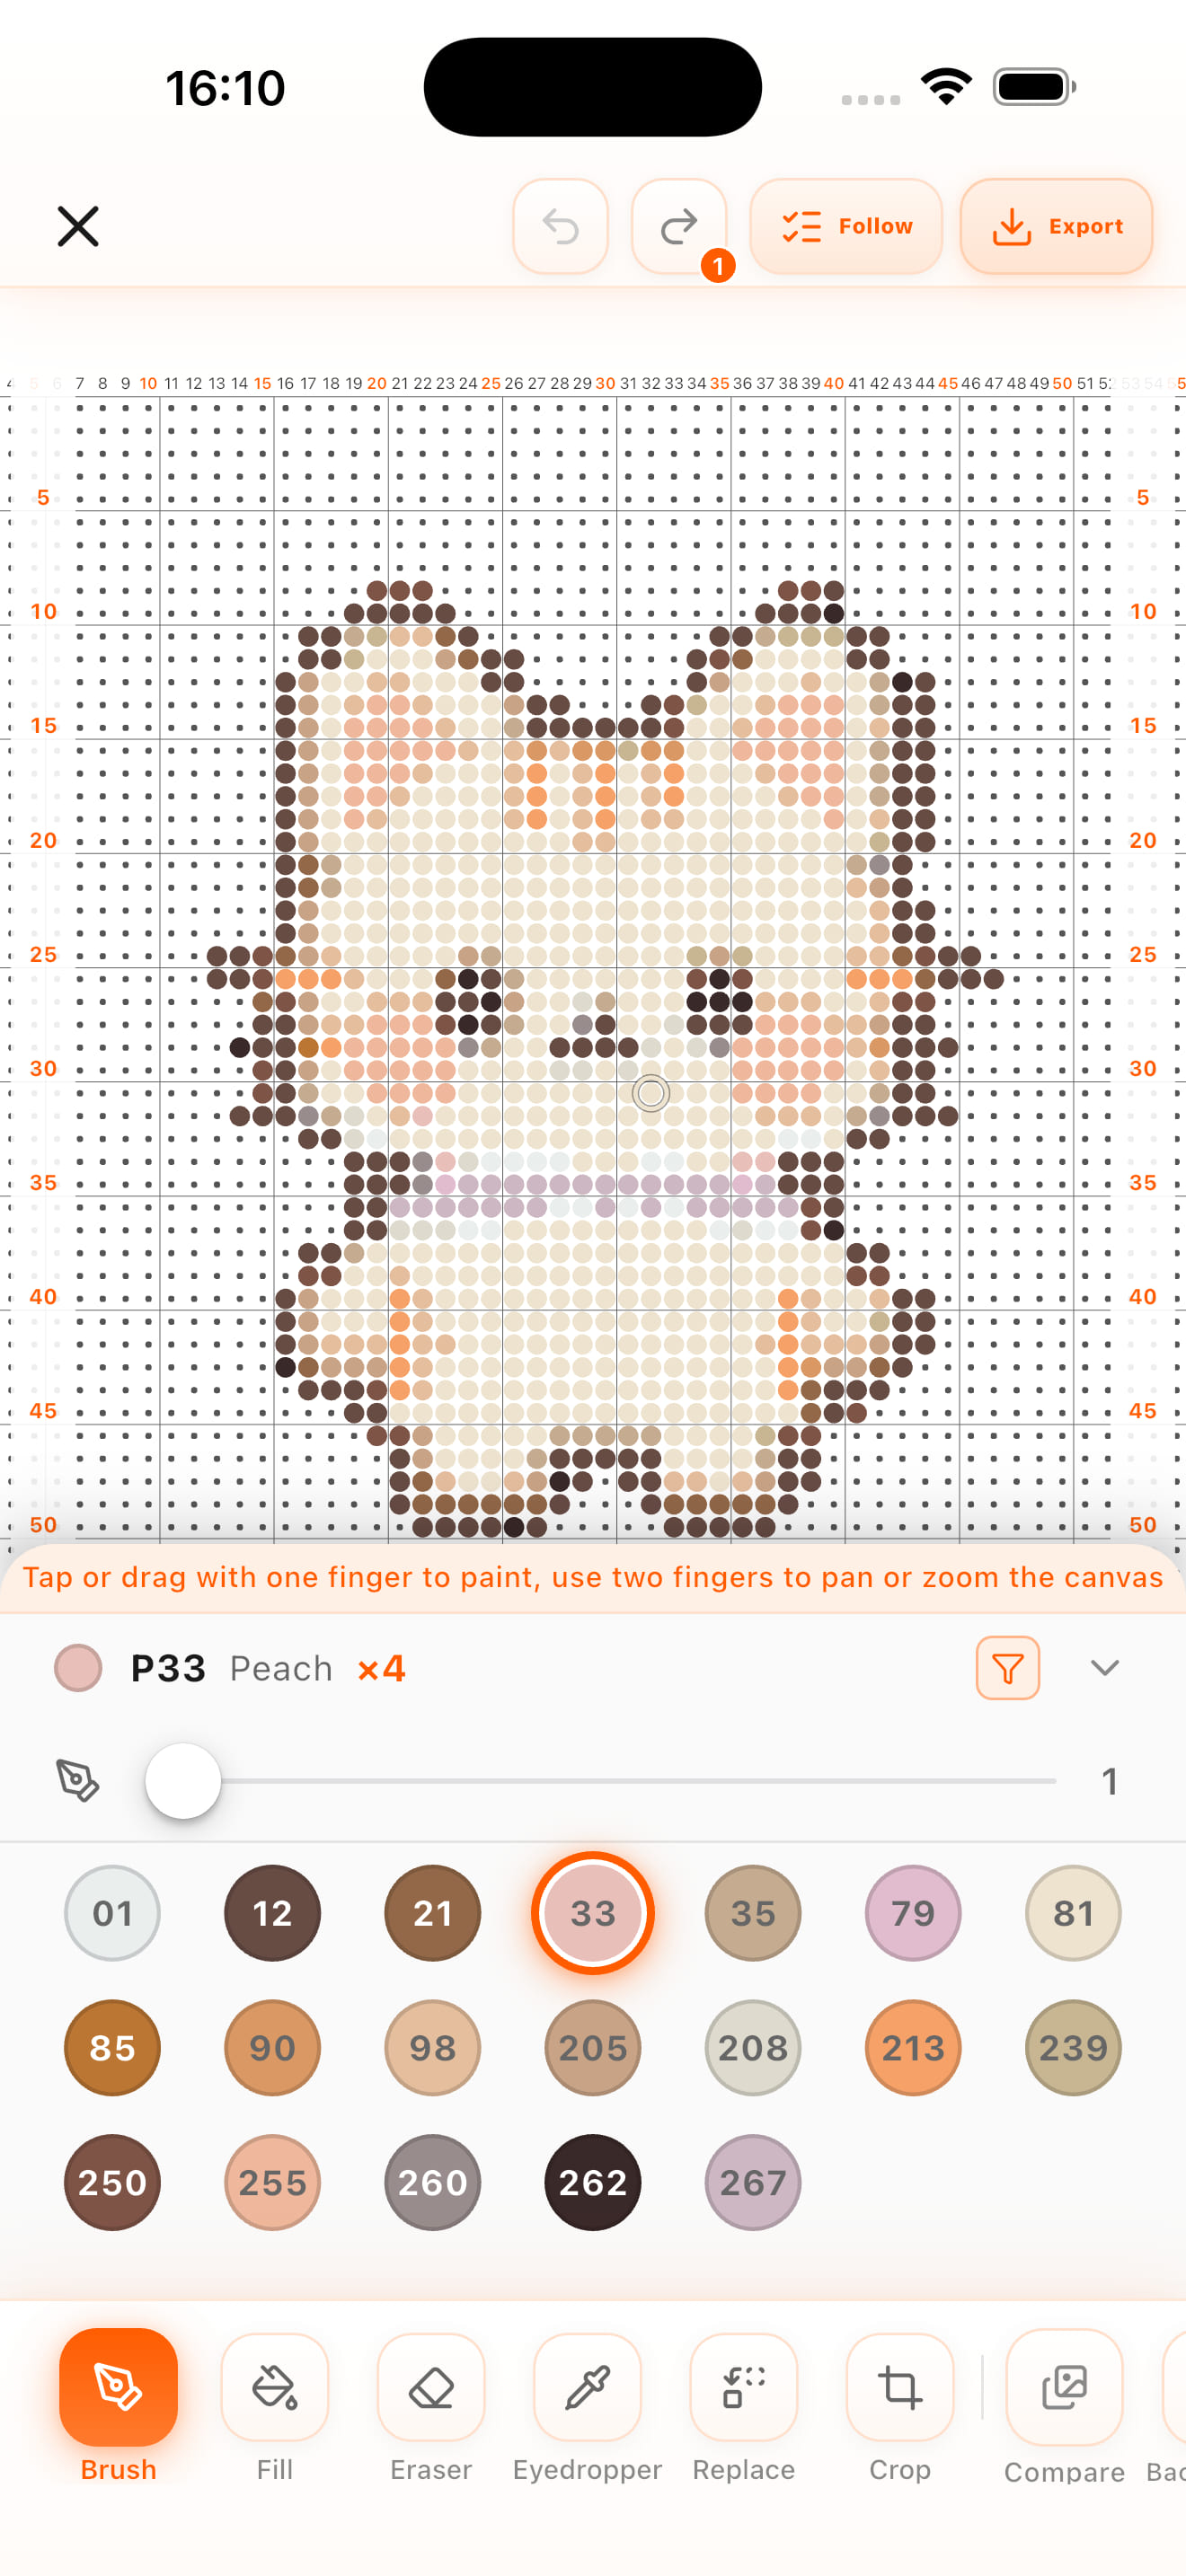
Open the pattern editor to make small changes. Use the brush for individual beads, fill for larger areas, the eraser to remove unwanted cells and the eyedropper to reuse a color already in the pattern.
Look for isolated colors, uneven outlines and small features that disappeared during conversion. A few deliberate edits around an eye or ear can improve recognition more than adding another set of similar colors.
5. Count beads for your custom pattern
Review the quantity required for each color and compare it with what you have. Prepare the beads and pegboards before starting. In PixelBead, follow the pattern by color and record your progress between sessions.
Work in a way that makes it easy to check placement. Take breaks and compare completed sections with the pattern. For finishing and fusing, follow the instructions supplied with your bead brand and equipment.
Your photo-to-bead-pattern checklist
Choose one clear subject. Crop out distractions. Match the pattern size to your boards. Select the correct bead palette. Check the outline and key features. Count your supplies before you begin.
Your first pattern does not need to preserve every pixel of the photograph. The aim is a recognizable design you enjoy making, at a size and color count you can finish.
Ready to try your own photo?
Pick a photo you love. Let PixelBead help you make it.